No Boil New Zealand IPA All Grain Beer Kit
On this page are the instructions for the 2 gallon kit and the 5 gallon kit. Please scroll to after the 2 gallon instructions for the 5 gallon kit instructions.
Following these instructions, even a first time brewer can brew an amazing beer. This is science and amounts, timings & temperatures need to be adhered to if your beer is going to be the best it can. If you are a honed brewer, please read the instructions just in case something is different.
For the experienced brewer, there’s a summary of the quantities, temperatures and timings at the end.
Make sure you have enough time to make your beer. The initial process will take around 2 hours. Don’t worry, you don’t need to stand over the beer for all that time! Just make sure you’re ready to check the temperature, or give it a quick stir every so often. So, let’s begin...
Everything that is going to come into contact with your wort and later beer needs to be sterilised first.
2 Gallon Brew In The Bag Hob Method
In the box are the ingredients you require to make this great beer, you’ll just need water and a few kitchen items.
You Will Need…
|
- 13 litre stock pot |
||
|
- Kettle |
- Sieve / Colander |
|
|
- Stove |
||
|
- Jug |
- Syphon |
|
|
- Spoon |
|

Mashing...
Pop your kettle on to boil. Wash your stockpot, sieve, mashing bag, beer paddle & thermometer in warm soapy water then sterilise with a brewing steriliser.
Put the mashing bag into the stockpot & tie around the rim. You’ll need to take if off later so tie it in a bow you can easily untie it.

Pour 9 pints of boiling water into the pot, then pour in 3 pints of cold tap water. Take the temperature using the thermometer, then bring the temperature of the water to 70°C by either putting it on the hob for a while or adding a little extra cold water.

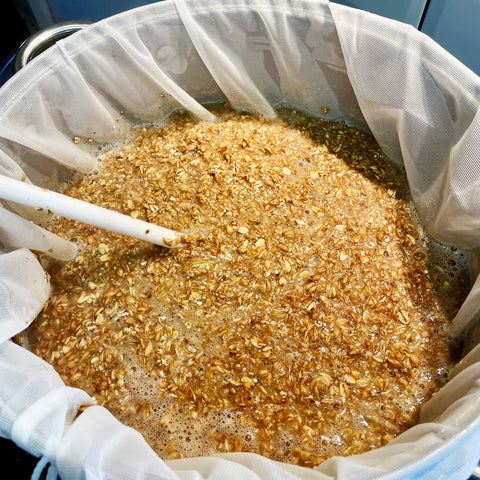
While stirring the water, gently empty the bag(s) of grain into the mashing bag. Stirring helps prevent the grains clumping together and forming dough balls. The contents of the pot are now called the ‘mash’.

Take a note of the time as we’ll be mashing for 60 minutes.
Check the current temperature of the mash, adding our grains will have cooled the water slightly.
We need to make sure the mash stays at 65°C.
Read the following very carefully...
Every 10-15 minutes thoroughly stir the mash then take the temperature. If the temperature of the mash has dropped below 65°C we’ll need to raise it back up. To do this, turn the heat on medium for 30 seconds maximum at a time. Turn the heat off, give the mash a good thorough stir and take the temperature again. Once back at 65°C pop the lid back on.
It’s very important to keep the temperature as close to 65°C as possible. When adding heat to the mash, do it gently. If you need to add more heat to get to your 65°C then use the 30 second method as explained above. Remember to stir well and retake the temperature.
It’s easy to add heat, but VERY hard to remove it without harming the grain. NEVER exceed 69°C during the mash.
Once 60 Minutes is up, fill up the kettle and switch it on.
Bitter Hopping 1…

Prepare the bittering hop addition by opening bag 1 (smaller bag) of hop pellets and pour into a straining bag. Tie the bag in a knot and put to one side.

Sparging…
Next, it’s time to rinse our grains to capture every last bit of sugar they have to offer. This is called ‘sparging’.
Carefully untie the mashing bag and pull the cords tight to close the bag. Lift the grains out of the water (now called the ‘wort’) keeping them over the pan as wort will run out of the bottom of the bag.

Bitter Hopping Interruption…
Whilst the grain is in the air, put the straining bag with the hops into the wort in the stockpot. They will break up in the bag and add some bitterness and aroma to the beer.

Return To Sparging…
Put your sieve on the stockpot and lower the bag of grain onto the sieve. Don’t empty the grain into the sieve, leave it in the mashing bag. Arrange the top of the bag so all the loose parts are neatly layered over the grain. This will help to distribute our sparging water.

Measure a pint of boiling water into a jug and very slowly dribble the water onto the bag of grain. Take at least 60 seconds to dribble 1 pint of boiling water over the mashing bag of grain. The slower you can go, the better! Be sure to distribute the water over the whole bag evenly.

Sparge your grains using a total of 8 pints of boiling water. Then leave the grains to drain for 5 minutes. One drained, remove the grains, they are spent and are no longer of use, feed them to the chickens!
Cooling…
We need to cool the wort to around 20°C.
You can do this quickly by filling your kitchen sink with cold water and carefully lowering the stockpot into the water. Keep the cold tap on a trickle and let water slowly flow around the stockpot (not on top) and down the sink’s overflow. Or, you can keep adding ice to your sink of water to cool the wort.

Once cool, remove & squeeze the bag of hops to extract any remaining wort. Remember to clean, wash and dry your hop straining bag as you will need this again in a few days.

Now syphon the wort into your fermentation vessel being careful to leave any sediment at the base of the stock pot.

Pitching The Yeast
Make sure the temperature of the wort is between 18°c and 22°C. Sterilise your hydrometer and trail jar and syphon a small amount of wort into your trail jar and pop in the hydrometer. The reading should be around 1.060. This is called our ‘OG’ or Original Gravity. Note down the OG and date. Don’t waste the sample you just took, pour it back into the bucket.
O.G. .................. Date ..................

Sprinkle the sachet of yeast onto the top of the wort and leave it, there’s no need to stir it in.

Put the bucket lid on lightly, just to stop dust from getting in and place your fermentation bucket in a warm place at 20°c for 7 days to allow fermentation to take place.
Check The Specific Gravity...
On Day 7, take a sample and check with your hydrometer. The reading should be around 1.010 - 1.014. If it is higher than this, put the lid back on and leave for a few more days until the SG is at the required level before Dry Hopping.

Dry Hopping…
Prepare the straining bag by boiling it in a little water with some sterilising solution added for 1 minute. Drain and rinse the bag in cold tap water.

Open Bag 2 (larger bag) of hop pellets and sprinkle into a straining bag.

Tie the bag and put it into the beer through any foam. They will break up in the bag and add some bitterness and aroma to the beer.

Put the lid back on your fermenter and leave the hops to infuse for 24 hours.
After 24 hours remove the straining bag, you can squeeze the bag to extract any remaining beer and extract extra aromas.

Checking The Fermentation Has Finished…
Sterilise your hydrometer and trail jar and syphon a small amount of beer into your trail jar and pop in the hydrometer. The reading should be around 1.010. This is called our ‘FG’ or Final Gravity. Note down the FG and date. Don’t waste the sample you just took, pour it back into the bucket.

F.G. .................. Date ..................
Bottling…
Syphon the beer from your fermenting vessel to a clean sterilised bucket and the priming sugar (this is sufficient for a sparkle) and gently stir to dissolve.


Syphon the beer into your bottles, seal and put in a warm place at 18-22°C for 3 days for the secondary fermentation to take place. Then put somewhere cool for 7 days to allow the beer to condition.

Put a bottle in the fridge to chill. Then open, pour and enjoy! CHEERS!

Experienced Brewer Timings & Info
2 Gallon Kit
|
- 7.5L Strike water temperature - 70°C |
- 5L Sparge Water @ 85°C |
- Dry Hop – 24 Hours |
|
- Mash Temperature - 65°C |
- Small Bag 1 of Hops at End Of Mash |
- 50g Priming Sugar |
|
- Mash Time - 60 Minutes |
- Large Bag 2 of Hops on day 7 of Fermentation. |
|
|
OG - 1.060 |
FG - 1.010 |
|
- - - - - - - - - - - - - - - - - - - - - - - - - - - - - - - - - - - - - - - - - - - - - - - - - - - - - - - - - -
5 Gallon Method
If you are an experienced brewer, please read the instructions just in case something is different especially as this is a no boil (raw beer) method. There’s a summary of the quantities, temperatures and timings at the end.
We have written these instructions with a view that both new brewers and experienced brewers can make this beer.
Depending on the equipment you are using, you may need to adjust the method slightly to suit your equipment, but whether you are using an all in one brewing system or separate mashtun and boiler, you will still get an amazing beer.
This is science, so, amounts, timings & temperatures need to be adhered to if your beer is going to be the best it can.
Make sure you have enough time to make your beer. The initial process will take around 3 hours. Don’t worry, you don’t need to stand over the beer for all that time! Just make sure you’re ready to check the temperature, or give it a quick stir every so often. So, let’s begin...
Everything that is going to come into contact with your wort, and later beer, needs to be sterilised first.
You Will Need…
|
- 25 litre Mash Tun |
- Syphon |
|
|
- Kettle / Water Heater |
- Spoon |
|
|
- Mashing Bag if using BIB method |
- Hydrometer |
|
|
- Straining Bag / hop basket |
- Fermenting Bucket |
|
|
- Thermometer |
- Beer Bottles + Caps / Keg |
|
Mashing...
Pop your water on to heat up. Wash your Mashtun, mashing bag, beer paddle & thermometer in warm soapy water then sterilise with a brewing steriliser.
Assemble your all grain mashing equipment.
Bring your 19 litres of strike water up to 70°C
While stirring the water, gently empty the bag(s) of grain into the mash tun. Stirring helps prevent the grains clumping together and forming dough balls. The contents of the pot are now called the ‘mash’.
Take a note of the time as we’ll be mashing for 60 minutes.
Check the current temperature of the mash, adding our grains will have cooled the water slightly.
We need to make sure the mash stays at 65°C.
Bitter Hopping…
At 60 minutes into the mash, prepare the bittering hop addition by opening Hop bag 1 of hop pellets and pour into the mash.
Sparging…
When the mash is close to finishing, fill up the kettle / water heater and switch it on. We are looking for a temperature of 85°C and we’ll need 13 litres.
Next, it’s time to slowly and gently pour the 13 litres of hot water over the grains. This will rinse the grains and capture every last bit of sugar they have to offer. This is called ‘sparging’.
Sparge your grains using a total of 13 Litres of water at 85°C. Then leave the grains to drain for 5-10 minutes. One drained, remove the grains, they are spent and are no longer of use, feed them to the chickens!
Cooling…
We need to cool the wort to around 20°C. You can do this quickly with a wort chiller. If you do not have a wort chiller, then fill your kitchen sink with cold water. Syphon the wort from your mash tun into your fermenting bucket and carefully lower the bucket into the water. Keep the cold tap on a trickle and let water slowly flow around the bucket (not on top) and down the sink’s overflow. Or, you can keep adding ice to your sink of water to cool the wort.
Syphon the wort into your fermentation vessel being careful to leave any sediment at the base of the mash tun.
Pitching The Yeast
Make sure the temperature of the wort is between 18°c and 22°C. Sterilise your hydrometer and trail jar and syphon a small amount of wort into your trail jar and pop in the hydrometer. The reading should be around 1.060. This is called our ‘OG’ or Original Gravity. Note down the OG and date. Don’t waste the sample you just took, pour it back into the fermenting bucket.
O.G. .................. Date ..................
Sprinkle the sachet of yeast onto the top of the wort and leave it, there’s no need to stir it in.
Put the bucket lid on lightly, just to stop dust from getting in and place your fermentation bucket in a warm place at 20°c for 7 days to allow fermentation to complete.
Checking The Specific Gravity…
On Day 7, take a sample and check with your hydrometer. The reading should be around 1.010 - 1.014. If it is higher than this, put the lid back on and leave for a few more days until the SG is at the required level before Dry Hopping.
Dry Hopping…
Sterilise your straining bag (boiling in a little sterilising solution for 1 minute then rinse with cold tap water ) / hop basket.
Open Bag 2 (larger bag) of hop pellets and sprinkle into the straining bag / hop basket. Tie the bag and put it into the beer through any foam. They will break up in the bag and add some bitterness and aroma to the beer. Put the lid back on your fermenter and leave the hops to infuse for 24 hours. After 24 hours remove the straining bag, you can squeeze the bag to extract any remaining beer and extra aromas.
Checking The Fermentation Has Finished…
Sterilise your hydrometer and trail jar and syphon a small amount of beer into your trail jar and pop in the hydrometer. The reading should be around 1.010. This is called our ‘FG’ or Final Gravity. Note down the FG and date. Don’t waste the sample you just took, pour it back into the bucket.
F.G. .................. Date ..................
Bottling…
Syphon the beer from your fermenting vessel to a clean sterilised bucket and the priming sugar (this is sufficient for a sparkle) and gently stir to dissolve.
Syphon the beer into your beer bottles, cap them and put in a warm place at 18-22°C for 3 days for the secondary fermentation to take place. Then put somewhere cool for 7 days to allow the beer to condition.
Kegging…
If possible purge your keg with CO2, then syphon the beer into your keg. Pressurise your keg with CO2 and leave to condition for 7 days.
This beer is best served chilled around 10°C. Pour and enjoy! CHEERS!
Summary - Brewer Timings & Info - 5 Gallon Kit
For 23 litres of fermentable wort…
|
- 19L Strike water temperature - 70°C |
- Small Bag of Hops at End Of Mash |
- FG 1.010 |
|
- Mash Temperature - 65°C |
- OG 1.060 |
- 125g Priming Sugar if bottling |
|
- Mash Time - 60 Minutes |
- Large Bag of Hops on day 7 of Fermentation. |
|
|
- 13L Sparge Water @ 85°C |
- Dry Hop – 24 Hours |
|